Headlight Upgrade
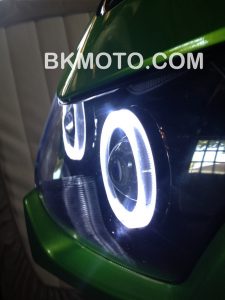
I finally got around to starting my winter bike project, now that spring is on the doorstep. I’m going to be installing a set of BK Moto BiXenon HID projectors with angel and devil’s eyes. I’ll be following the install on Ninjette.org and going into a bit more detail on installing the wiring, (including the switch), in addition to things I encounter on the way. I’ll be editing this post as I go, so anyone interested can follow along here to get a good idea of what doing this project yourself entails.
So, if you’re interested – click Read More for the gritty details.
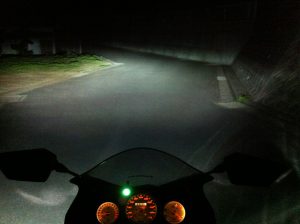
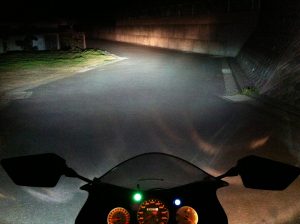
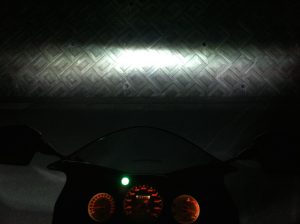
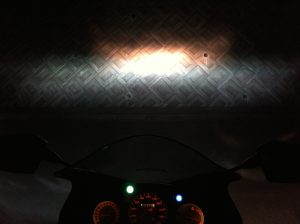
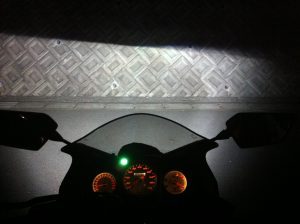
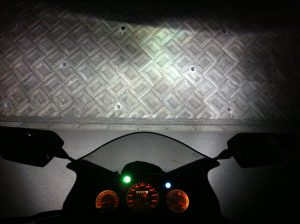
I took some pics of my current headlight, so I could compare the beams and to help me adjust the new light after I install it. I currently have an HID installed in the low beam and the stock bulb in the high beam. Here are the pics:
First thing I did, was order a used headlight from Yahoo Auctions. Since you have to disassemble the light, I didn’t want to risk screwing up and not having a ride. So, I’m doing this install in the used light, then I’ll just swap it into the bike, install the switch, and BOOM – I’ll have projectors.
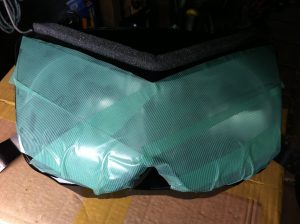 To be safe, I taped up the lens on the light to avoid any scratches. (Be careful what kind of tape you use. If the adhesive is too strong, it will remove a coating on the outside of the headlight. I noticed it on my current headlight, then saw it on the headlight I used in the installation after removing the tape. – This green tape is what we’ve used on track days a couple times, which is where my original headlight had the coating affected.)
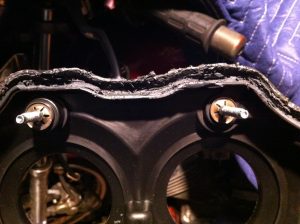
Then, I used a heat gun and removed the glass lens from the headlight body. As it says in the Ninjette walk through, it took about 45 minutes. The lip on the front glass is about 1/2 an inch wide. The plastic on the body gets quite soft when heated, so be careful not to insert the screwdriver too far as you can poke a hole through it. Also be careful about the 4 locking tabs on the lens. I’d say each one is almost a 1/4 inch high.
Here’s what it looks like when you finally get it removed.
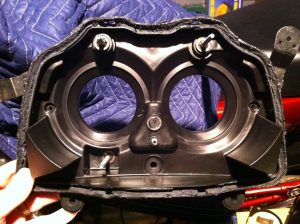
Then, I removed the reflector from the body.
I will be painting it with heat resistant black matt paint for the install. Afterwards, I took probably about an hour to clean as much of the hardened glue I could out of the groove on the body and off the lens itself.
That was all I got done today, so …. to be continued.
Well, it’s been a busy week, but I got a bit done on the light today, and hope to paint it tomorrow.
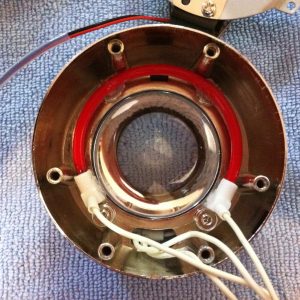
I removed the hardware from the back of the projectors, cleaned the insides, then put them back together rearranging the wiring so that on one they come out on the left side of the high-beam engine and the right side on the other.
Although the install instructions tell you how to glue the devil’s eyes into the projector, mine came already installed. I think the way they only put silicon on the screws holding the lens is better than laying down a whole line of it as shown in the instructions.
I also drilled the holes in the headlight reflector in preparation for painting it tomorrow. (If you remove the reflector from the assembly, make sure you drill the holes in the bottom, not the top.)
And I’ll let you know how that goes when I’m done with it!
Okay, just an update. This supposed one day job has turned into one of those projects from hell. The guys at BKMoto sent the wrong bulbs with my kit (no dust caps) so I had to wait for the right ones. Then once I got everything put back together and tested, I took it out for a quick road test to adjust the height. Within 5 minutes one of the ballasts had blown. Now (May 10th) I’m still waiting for the replacement ballast. (At least the guys at BKMoto have been straight up in dealing with these problems for me.)
For painting the reflector, I had a bit of a problem. I bought high heat paint that didn’t say “Don’t use on chrome.” – All the other paint had that on the can. However, when the paint dried, it didn’t really stick to the shiny surface of the light. (There were cracks in the paint you could see the chrome through.) It didn’t look too bad after 3 or 4 coats though. I recommend either a primer, or probably even better – score the reflective surface with some fine grit sandpaper.
The little bit that both bulbs were working showed the potential for this kit – it’s a whole new and brighter world out there!!
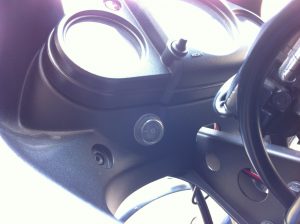
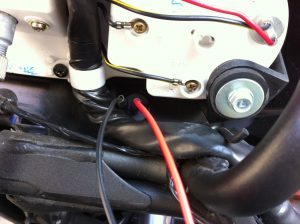
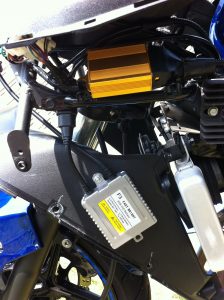
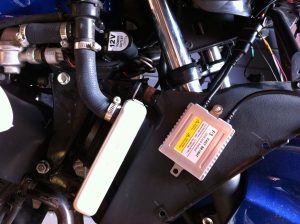
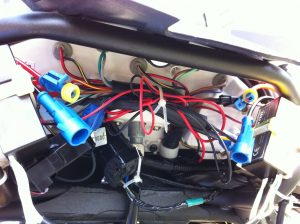
Here are some pics to show where I’ve put the wires and hardware. (Click to see the big version.)
This is where I installed the headlight switch they included with the set. I had to use a drill bit from the back of the assembly and just gradually make the hole bigger – making sure it was round. It turned out pretty good. It’s not overly obvious, should be out of the weather for the most part, and is easily accessible with my left hand.
This is the switch from the back. (The black and red wires at the bottom of the pic.)
Left side ballast & relay (The gold box) – the cables on the relay are just barely long enough to go from the battery to the light – so I found this to be the best spot. That’s the horizontal stabilizer for the headlight assembly that it is attached to.)
The right side ballast. Ballasts are attached by one screw at the top and the dual-sided tape on the back. (You can also see my accessory adapter cable.)
As you can see, I tucked all the wiring up under the gauge panel. This just keeps it tidy and stops stuff from flapping around or dropping down so it’s in the way.
↑ These are the new low beams. ↑ Here are the high beams.
Well, I finally got the project finished. Instead of a couple mellow days of working on my bike, I got a 2 month project that made me miss some of the best riding season in Nagasaki.
However, the lights are great. The kit really does brighten the road significantly. I will have to get used to how it cuts so cleanly when you lay the bike into the corners. I may also adjust it up a little. Take a look at the photos above and compare them with the initial shots I uploaded. They really show how much more of an area the lights illuminate, especially the shots on the wall.
All-in-all I think this kit is worth the price. It would have been nice to get it done sooner, but hey – shit happens.

